Roof Replacement Timeline: What to Expect Day by Day (2026)
Updated for 2026 • Expert-reviewed • Homeowner-focused
Need a professional opinion? Get free quotes from local roofing pros
Compare Free Roofing QuotesMost residential roof replacements take 1–3 days for a standard asphalt shingle roof on a single-story home. But the full process — from first phone call to final inspection — spans 2–6 weeks depending on your area, the season, and material availability. Knowing what happens at each stage eliminates surprises, helps you prepare your home, and gives you the confidence to hold your contractor accountable if things go sideways. Here is the complete timeline, based on how professional roofing crews actually operate.
Week 1–2: Contractor Selection and Inspection
The process starts with getting 3+ quotes from licensed, insured contractors. Each contractor should perform an in-person inspection — climbing on the roof, checking the attic for ventilation and decking condition, and measuring the roof area. Avoid contractors who quote from the ground or use satellite measurements alone; these often miss critical details like damaged decking, poor ventilation, or layered shingles that need full tear-off.
- Schedule inspections 1–2 days apart so you can compare findings
- Ask each contractor to explain what they found on the roof and in the attic
- Review and sign the contract — make sure it includes start date, materials, scope, and payment schedule
- The contractor should pull a building permit (required in most municipalities). This triggers a city or county inspection after the job is done, which protects you.
Week 2–3: Pre-Installation Preparation
Once you sign a contract, the contractor orders materials and schedules your job. Here is how to prepare your property:
- Move vehicles out of the driveway — the dumpster and material delivery need that space
- Clear 15 feet around your home's perimeter — patio furniture, grills, potted plants, and anything fragile
- Cover items in the attic with tarps or plastic sheeting — the tear-off process creates dust and vibration
- Warn your neighbors — there will be noise from 7 AM to 6 PM, dumpster placement, and delivery trucks
- Secure pets inside or off-site — roofing is loud, the yard will have debris, and gates may be left open
- If you have a satellite dish on the roof, call your provider to schedule removal and reinstallation
- Take down any wall-mounted pictures or mirrors on upper floors — hammering vibrations can knock them loose
Day 1: Tear-Off and Decking Inspection
This is the loudest and most disruptive day. The crew arrives early (typically 7–8 AM), sets up safety equipment and tarps to protect landscaping, and begins stripping the old roof down to the plywood decking. A standard 2,000 sq ft roof generates 3–5 tons of debris. The crew uses specialized "shingle eater" tools and shovels to remove everything — shingles, underlayment, old flashing, and pipe boots. Once the decking is exposed, the foreman inspects every sheet for rot, delamination, and structural damage. Any compromised decking is replaced on the spot — this is the most common source of unexpected cost.
- Expect: extreme noise, vibration, and dust from 7 AM to late afternoon
- Typical cost for decking replacement: $75–$150 per 4x8 sheet, installed
- A good crew replaces 0–5 sheets on average. More than 10 sheets suggests serious underlying issues.
- The crew should tarp any exposed areas before leaving for the night in case of rain
Day 1–2: Underlayment, Flashing, and Ventilation
After decking is repaired, the crew installs the waterproofing layers that actually keep your home dry. This is the most important phase of the job — more leaks are caused by improper underlayment and flashing than by defective shingles.
- Ice and water shield (self-adhering membrane) goes on eaves, valleys, around skylights, chimneys, and all roof penetrations
- Synthetic underlayment covers the remaining roof surface — this is your secondary water barrier if a shingle fails
- New drip edge is installed along eaves and rakes to direct water into gutters
- Step flashing and counter flashing are installed where the roof meets walls, chimneys, or dormers
- New pipe boots (rubber or lead) replace old ones around plumbing vents
- Ridge vent is prepped (if being upgraded) — this provides attic exhaust ventilation
- Soffit vents are checked to ensure proper intake airflow — without intake, ridge vent is useless
Day 2–3: Shingle Installation
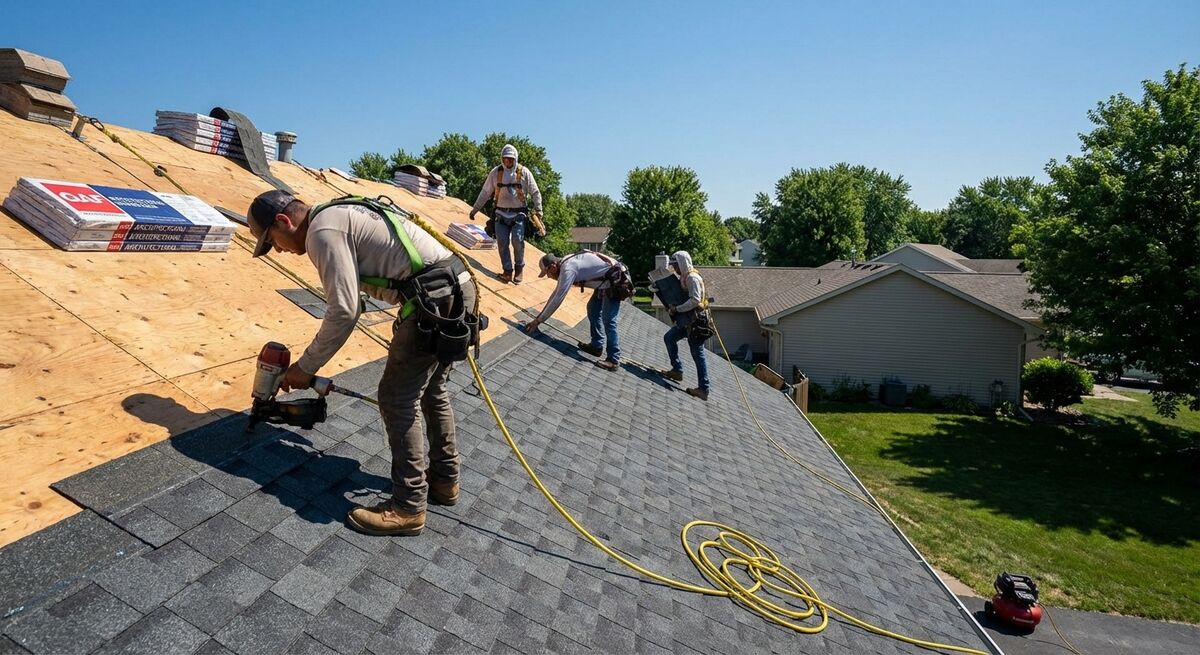
With waterproofing complete, the crew begins installing shingles from the bottom up. A 4–6 person crew can install 25–40 squares per day (one square = 100 sq ft). For a typical 20–25 square roof, this takes most of a full day.
- Starter strip goes on first along the eaves and rakes — this is the adhesion layer that prevents wind uplift
- Shingles are installed in offset courses from bottom to top, following the manufacturer's nailing pattern
- Each shingle requires 4–6 nails depending on wind zone — high-wind areas require 6-nail patterns
- Hip and ridge cap shingles are installed last — these are the finishing pieces along ridges and hips
- The crew performs a final quality check: alignment, nailing, flashing seals, and clean starter courses
Day 3: Cleanup and Final Walk-Through
A professional crew takes cleanup seriously — it protects your property and their reputation. After the last shingle is nailed, the crew performs a magnetic nail sweep of the entire property (driveway, yard, flower beds, sidewalks) to collect stray nails. Tarps are removed, debris is loaded into the dumpster, and the dumpster is hauled away. The foreman should walk you through the completed job, pointing out key details: ridge vent installation, flashing work, clean lines, and any areas where extra work was done (like decking replacement).
- Inspect the roof from the ground with binoculars — look for straight lines, consistent color, and clean flashing
- Check gutters and downspouts for debris
- Walk the perimeter looking for stray nails, shingle fragments, or landscape damage
- Ask for "before and after" photos if the crew took them — reputable contractors document their work
- Do NOT make final payment until you are satisfied with the cleanup and walk-through
Week 3–6: Final Inspection and Warranty Registration
After the job is complete, two important things should happen. First, the building inspector performs a final inspection to verify the work meets local building code. Your contractor should schedule this. If the work fails inspection, the contractor is responsible for making corrections at no additional cost to you. Second, the contractor should register your warranty with the shingle manufacturer. This is especially important if the contractor is manufacturer-certified, as certification unlocks enhanced warranty coverage (e.g., GAF's Golden Pledge, Owens Corning's Platinum Protection). Ask for written confirmation of warranty registration.
Ready to Get Real Quotes?
Compare Free Roofing Quotes Near YouKey Takeaways
- A standard asphalt shingle roof replacement takes 1–3 days of active work on the roof
- The full process from first quote to final inspection spans 2–6 weeks
- Day 1 (tear-off) is the loudest — prepare your home, attic, neighbors, and pets
- Underlayment and flashing installation (not the shingles) is what actually keeps your home watertight
- Don't make final payment until the walk-through is complete and you've inspected the work
Frequently Asked Questions
Get Free Quotes from Local Roofing Pros
Compare estimates, warranties, and timelines from contractors in your area. 100% free and no obligation.
100% Free Service
No hidden fees for homeowners.
Local Matching
We connect you with contractors in your ZIP code area.
Better Pricing
Comparing bids can save you 15-25% on your total project cost.